September 14, 2026
How to ollie on a skateboard
A step-by-step breakdown from someone who has taught this trick thousands of times.
The ollie is the foundation of almost everything in skateboarding. It’s how you get off the ground. Once you can ollie, you can ollie up curbs, over cracks, onto ledges, and eventually into kickflips and heelflips. Every trick builds on this one motion.
But it’s also the trick that frustrates people the most. I’ve been teaching skateboarding for over 20 years, and the ollie is where most students hit their first real wall. Not because it’s impossibly hard, but because it’s counterintuitive. Your brain has to learn something that doesn’t feel natural at first.
Here’s how I break it down in lessons, and the mistakes I see most often.
What do you need before learning to ollie?
You need to be comfortable pushing, turning, and stopping on your board before attempting an ollie. Most instructors recommend at least a few weeks of basic riding first. A standard popsicle-shape deck with a kicked tail, flat-soled skate shoes, and a helmet are the essentials.
You should be comfortable riding before you try to ollie. That means you can push, turn, and stop without thinking too hard about it. If you’re still getting used to standing on the board, spend more time cruising first. My beginner’s guide covers all the fundamentals. I also wrote a separate guide on what to know before your first lesson if you’re just starting out.
For your first ollie attempts, try it on grass or carpet. The board won’t roll out from under you, so you can focus on the motion without worrying about balance. Once the pop feels consistent, move to smooth flat ground.
Where do you put your feet to ollie?
Your back foot sits on the tail with the ball of your foot centered on the kick. Your front foot goes just behind the front bolts, angled about 30 to 45 degrees. Shoulders stay parallel to the board—where they point, your body follows. Foot placement is the most corrected detail I see in lessons.
Your back foot goes on the tail of the board. The ball of your foot should be right on the curved end, not the flat part. This is where the pop comes from. If your foot is too far forward on the tail, you won’t get a clean snap.
Your front foot goes somewhere around the middle of the board, just behind the front bolts. Angle it slightly, maybe 30 to 45 degrees. Some people keep it almost straight across the board, others angle it more. There’s no single correct position here. What matters is that you can slide your foot forward when the time comes.
Keep your shoulders square with the board. Where your shoulders point, your body follows. If your shoulders twist, the board twists with them.
How do you pop the tail for an ollie?
You snap your back foot straight down on the tail so it strikes the ground and bounces the board up. The motion is quick and vertical—think cracking an egg on the pavement, not pushing backward. You should hear a sharp “pop” sound. If it’s a scrape or thud, the angle or force needs adjusting.
The pop is a quick, sharp snap of your back foot straight down on the tail. Think of it like stomping on the end of the board. The tail hits the ground, and the board bounces up. That bounce is what gets you airborne.
The most common mistake here is pushing the tail backward instead of straight down. If you push back, the board shoots out in front of you. Straight down, like you’re cracking an egg on the pavement. Quick and direct.
You should hear a sharp “pop” sound when the tail hits the ground. If it’s more of a scrape or a thud, you’re not snapping hard enough or your foot isn’t in the right spot on the tail.
How does the front foot slide work in an ollie?
Right after the pop, you roll your front ankle and drag the side of your shoe up the grip tape toward the nose. This levels the board in the air and brings it up with you. The timing between the pop and the slide is the entire trick—too early and the board isn’t airborne yet, too late and it’s already falling.
This is the part that makes the ollie work. Right after you pop the tail, you slide your front foot up toward the nose of the board. Use the side of your shoe, near the ankle bone area, to drag along the grip tape. Having the right shoes makes a real difference here. That sliding motion is what levels the board out in the air and brings it up with you.
The slide has to happen while the board is rising from the pop. If you slide too early, the board isn’t in the air yet. If you slide too late, it’s already falling back down. The timing between the pop and the slide is the whole trick. And honestly, this is where the weeks of practice come in. Your muscles need to learn the rhythm.
Think about rolling your front ankle so the outside of your shoe catches the grip tape. You’re not stomping forward. It’s more of a drag, guiding the board upward as your foot moves toward the nose.
Want to try it yourself?
Book a private lesson with Leon. NYC and Westchester, all ages and skill levels.
How do you jump while doing an ollie?
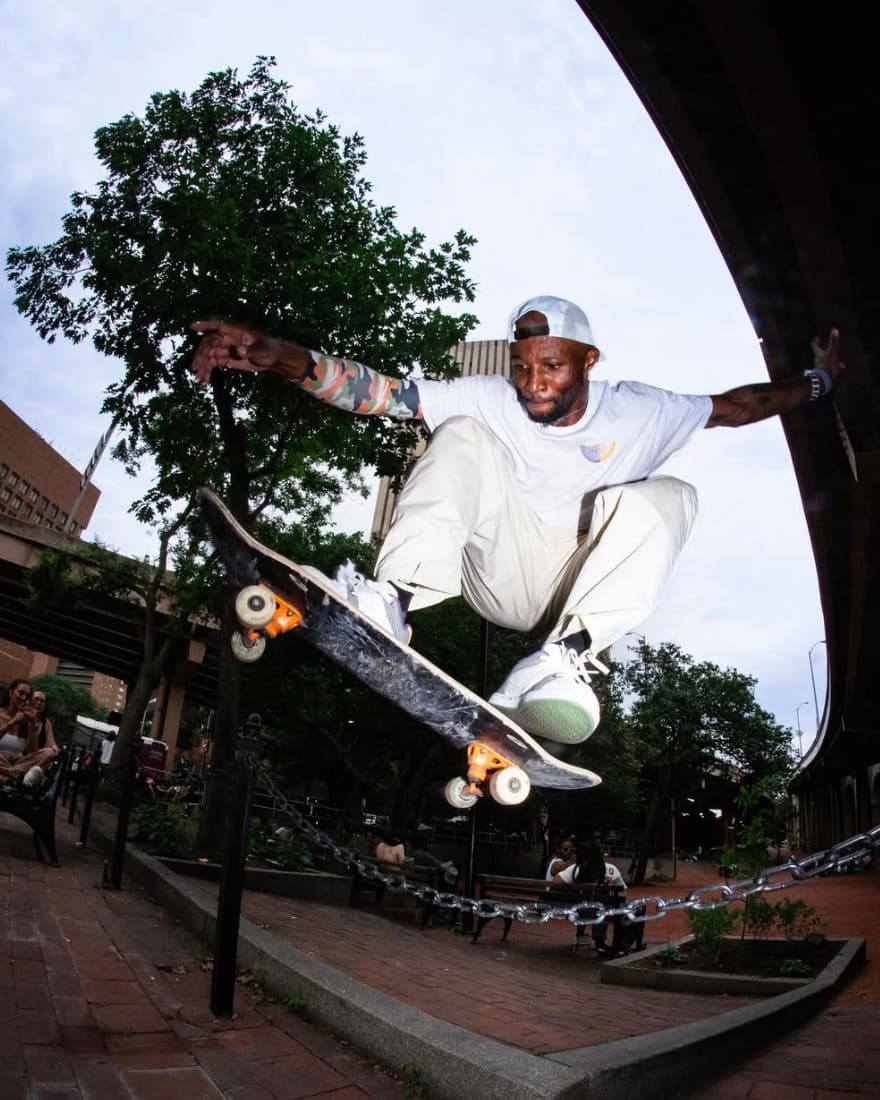
The pop and the jump happen at the same time—you snap the tail down while springing your whole body upward. Both feet leave the ground. After popping, pull your knees toward your chest to give the board room to rise underneath you. The higher you tuck your knees, the higher the ollie goes.
Here’s what trips people up. You have to jump. Both feet need to leave the ground. Many beginners pop the tail but keep their weight planted, which pins the board to the ground. The pop and the jump happen together. You snap down with your back foot and spring up with your whole body at the same time.
Bend your knees before the pop so you have room to jump. After you pop, bring your knees up toward your chest. This gives the board space to rise underneath you. The higher you pull your knees, the higher the ollie.
Landing is simple in theory: keep both feet over the bolts and absorb the impact by bending your knees. In practice, you’ll land off-center plenty of times before it becomes consistent. That’s normal. Wearing proper pads while you’re learning takes the sting out of bad landings.
What are the most common ollie mistakes?
Not jumping, leaning back, and sliding the front foot too early are the three I correct most often. After 20-plus years of teaching ollies, these account for the vast majority of missed attempts I see. Most students only need one or two small adjustments to start landing them.
After 20+ years of teaching ollies, the same mistakes come up over and over. Knowing them ahead of time helps.
- Not jumping. The pop alone does not get you in the air. You have to jump with the pop.
- Leaning back. If your weight shifts to your heels, the board flies out in front. Stay centered.
- Sliding the front foot too early. Wait for the tail to hit the ground before you start the slide.
- Pushing the tail backward instead of straight down. Straight down, every time.
- Stiff legs on landing. Bend your knees when you land. Locked knees on impact is how ankles get hurt.
- Looking down at your feet. Your feet know where the board is. Look ahead.
How long does it take to learn an ollie?
Most beginners land a stationary ollie within 2 to 4 weeks of regular practice—meaning a few sessions per week, not just one. Rolling ollies usually take a few more weeks after that as the board’s movement changes the timing. Age, athletic background, and practice frequency all affect the timeline.
Most of my students land a stationary ollie within 2 to 4 weeks of practice. That means practicing a few times a week, not just once. The motion has to get into your muscle memory, and that takes repetition. I cover the typical timeline in my post on how many skateboard lessons it takes.
Rolling ollies usually take a few more weeks after that. The board moving underneath you changes the timing, and your brain needs to adjust. Some people get it faster, some slower. Age, athletic background, and how often you practice all play a role.
One thing I tell every student: the ollie will feel impossible right up until it doesn’t. You’ll grind on it for days, getting frustrated, and then one attempt will just work. Something clicks and suddenly you can feel the timing. That’s how skateboard tricks are. They don’t come gradually. They come all at once after a lot of failed attempts. I wrote more about why that process matters in You Can’t Prompt Your Way to a Kickflip.
Do you need a lesson to learn how to ollie?
You don’t strictly need one, but a lesson can cut weeks off the learning curve. YouTube shows you what an ollie looks like, but it can’t diagnose your specific mistakes in real time. Most students I work with are making one or two small errors they can’t identify on their own.
YouTube can show you what an ollie looks like, but it can’t see where your weight is sitting. In a private lesson, I can watch your feet, your shoulders, and your timing in real time. Most students are making one or two small mistakes that they can’t identify on their own. A slight adjustment to foot placement or weight distribution can unlock the trick in a single session.
If you’ve been working on your ollie and something isn’t clicking, bring it to a lesson. I’ll figure out what’s going wrong and give you specific things to work on between sessions. That feedback loop is what gets people past the plateau.
Frequently asked questions
Want help with your ollie?
Private lessons in NYC and Westchester. I’ll watch your technique, find what’s off, and give you a clear plan to practice on your own.
Book a Lesson